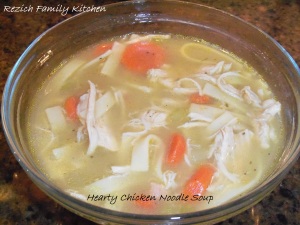
Hearty Soups and Stew Recipes


Rezich Family Kitchen

Can you tell we’re anxiously waiting for spring and summer?  Like most of the country our temperatures in Michigan are unbelievable cold.  At 3:00 p.m. in the afternoon, with the sun shinning we are at -2 degrees F.

Snow Storm January 2014

Great day for staying indoors and making a hearty soup or chili that will warm you from the inside out.  Today we’d like to share with you the link to our Chili, Soup and Stew Recipe page.

Visit our Chili, Soup and Stews Page at Rezich Family Kitchen

https://rezichfamilykitchen.wordpress.com/chili-soups-and-stew-recipes/


046

Cocoa Chili

Loaded Chicken And Potatoes

Today I have a special treat, a recipe from my daughter Nikki.  Nikki is a wonderful cook, like her momma she isn’t afraid to try new things or to deviate from a recipe to make it her own.  If Nikki is afraid of anything it’s the thought of me turning the blog over to her, just can’t seem to get Nikki comfortable with writing about her cooking adventures.  I’m working on it though.

We’re pretty proud of our girl.  She is going through some life changes lately some are good, a few are bad, others are sad.  But Nikki is a strong girl with a good head on her shoulders, there is no doubt she is going to come out on top of all of this.

Recently Nikki quit her job of eight plus years because of the hours and the time it was taking her away from her little man Eric who started Kindergarten this past September.  As scary as that decision was it turned out to be the right one.  Nikki immediately landed a great job with endless possibilities; a great place for her to settle into a career and not just a job.  Best of all she can take Eric to school in the morning and she is home at night with her little man.  Eric loves it and so does Nikki!   It also means that I get to spend a couple hours a day, a few days a week with Eric before Nikki comes home.  It’s a win, win, win for all three of us!

Eric and Nikki have been putting their time together to good use.  They do homework, read books, play outside, go for walks and play on ABC Mouse.  They have been cooking up a storm too!!  It’s fun watching them together, Nikki will actually ask Eric what they should make for dinner, he gives his opinion.  A family meeting resulting in a joint decision, a mutual agreement.  Needless to say I am hoping that all this cooking and experimenting over there is going to be great for our blog!

Yesterday when Nikki shared this recipe on her Facebook page and posted that she was making it for dinner last night I knew I had to get her to let me blog about it.  I had no doubt that I wouldn’t get Nikki to write the blog so we agreed that she would whip up the dish and let me know how it turned out so I could blog about it.

When Nikki took it out of the oven she sent me a picture via text and her message read; “Smells and looks fantastic!”  After she taste tested it she sent me another text; “OMG!!  Cajun instead of paprika one “hell of a kick!!”  It’s awesome!!  No doubt Nikki is my daughter, she used Cajun instead of the paprika the recipe calls for.  Not only did she make a spice switch she made sure it was spicy too!!

This dish is easy to make and can be put together pretty quickly.  Perfect for a fall evening at home while spending time with those you love.  Give it a try!

Thanks Nikki!!  Can I put my request in now for one new recipe a week?  Next I have to work on my momma, she has some great recipes I’d like to share, I just need to get Mom a digital camera for photo’s!!

Have a great Thursday everyone!!

Loaded Chicken and Potatoes

LOADED CHICKEN AND POTATOES

Ingredients:

1 lb boneless chicken breasts, cubed (1″)

6-8 medium skin on red potatoes, cut in 1/2″ cubes

1/3 c olive oil

1 1/2 tsp salt

1 tsp black pepper

1 Tbsp paprika (Nikki substituted Cajun Seasoning)

2 Tbsp garlic powder

2 Tbsp hot sauce (more if you like it HOT)

Topping:

2 c fiesta blend cheese

1 c crumbled bacon

1 c diced green onion (Nikki omitted the onion)

Directions:

  • Pre-heat oven to 400 degrees.
  • Spray a 9X13″ baking dish with cooking spray
  • In a large bowl, mix together the olive oil, salt, pepper, paprika (cajun seasoning), garlic powder, and hot sauce
  • Add the cubed potatoes and chicken and stir to coat
  • Carefully scoop the potatoes and chicken into the prepared baking dish
  • Bake the potatoes and chicken for 55-60 minutes, stirring every 20 minutes, until cooked through, crispy, and browned on the outside
  • While the potatoes are cooking, fry your bacon (about half a pound)
  • Once the potatoes and chicken are fully cooked, remove from the oven
  • Top the cooked potatoes with the cheese, bacon, and green onion
  • Return the casserole to the oven and bake for 5 minutes or until cheese is melted

Serve with any of the following:

  • Extra hot sauce
  • Ranch Dressing
  • Sour Cream

Source:  N. Kiester (Source: SuperMoms Raising Healthy Kids – Kristen Washington)
Hershey Bar Pie

I’ve been asked recently why I’ve not been posting daily as I’ve done in the past.   The main reason is lack of time.  For those that don’t know or are new to our family blog, I went back to work in May and took a short break from writing for several reasons including the new job.  Even though it’s part-time, other obligations have made it harder for me to sit down and write so that’s why there has only been a Sunday and Monday post.  On Saturday I can compile info for Sunday’s “Coming Up This Week…,” finish personalizing it on Sunday morning before I publish it.  On Sunday I start to write Monday’s post, adding a few finishing touches on Monday morning before I hit the publish button.

My goal is to return to blogging at least 3-4 times per week (hopefully soon) and maybe even make a few minor changes in content.  We’re still cooking and baking, still working on crafts and projects.  I hope you’ll bear with us during this time of transition.

Today we want to share with you a recipe for Hershey Bar Pie.  I actually made this for Joshua who is hooked on the Hershey Bar Pie from Burger King.  Although in Joshua’s eyes it didn’t compare to Burger King’s Hershey Pie, he thought it was a great runner-up.  I had one piece, papa and Joshua took care of the rest over the course of a few days.  I’d say it was a huge hit.

This pie is easy to make, light and delicious.  If you want to whip up something quick for your sweet tooth, something to serve to friends and family or something sweet to take as a “dish to pass” event, this pie is perfect.

Hershey Bar Pie

HERSHEY BAR PIE

What You’ll Need:

1 (6.0 oz.) HERSHEY’S Milk Chocolate Bar, broken into pieces
1 tub (8 oz.) frozen non-dairy whipped topping, thawed
1 packaged crumb crust – I used Chocolate – You can also make your own

Directions:

  • Place candy bar pieces in medium microwave-safe bowl. Microwave at MEDIUM (50%) 1 minute or until chocolate is smooth when stirred
  • Cool chocolate slightlyFold whipped topping into melted chocolate; spoon into crust
  • Cover; refrigerate 6 hours or until firm
  • Garnish as desired
  • Cover; refrigerate leftover pie

Makes 6 to 8 servings

Source: https://www.hersheys.com/recipes/recipe-details.aspx?id=3515&name=Easy%20HERSHEY%20Bar%20Pie

Crock Pot Buffalo Chicken Pasta

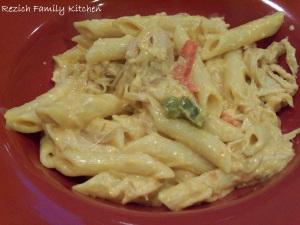
There is no denying that I have been on a mission, for several years now, to find the perfect recipe that comes even remotely close to Red Robin’s Sante Fe Chicken Pasta, which unfortunately they replaced it with Southwest Chicken Pasta and there is absolutely no comparison between the two, I’d rather have the original Sante Fe Chicken Pasta.

Sante Fe Chicken Pasta had a great kick to it, a creamy alfredo sauce with chipolte peppers, sweet red and green peppers. slivers of sautéed red onion served over a bed of penne pasta and grilled chicken breast on top – YUMMY!  Over the years I’ve tried several “Sante Fe” type recipes and they just don’t come close enough for me so, I keep trying.

When I found this recipe, Crock Pot Buffalo Chicken Pasta, on Pinterest through allthecooks.com; http://www.allthecooks.com/crockpot-buffalo-chicken-pasta.html.  I did make just a few minor additions, I added sliced red, green and yellow peppers (half of each one) along with a small red onion slivered.  I tossed it in about an hour before dinner was scheduled to be ready.

I knew this wasn’t going to taste like the Sante Fe Chicken Pasta I was craving but it sure did look delicious and I was hoping that the buffalo wing hot sauce would give it enough of a kick for me.  I’m happy to say this recipe was quite delicious and easy to make.  Go ahead, give it a try.

Crock Pot Buffallo Chicken Pasta

CROCK POT BUFFALO CHICKEN PASTA

What You’ll Need:

1 pound ·  Chicken breasts, bite-sized pieces

1 can · Cream of chicken soup

½ cup · Hot sauce, like for buffalo wings

1 ½ cup · Shredded mozzarella cheese

½ cup · Crumbled blue cheese

Sliced red, green and yellow peppers

Sliced red onion – thin

3 cup · Uncooked penne pasta

1 ½ cup · Sour cream

Directions:

  • Season chicken with salt and pepper and put in crock pot
  • Add soup and hot sauce and stir
  • Cook on low 4-6 hours or high 2-3 hours
  • About an hour before adding the cheeses and sour cream add your onion and peppers
  • Stir in cheeses and sour cream
  • Turn off crock pot
  • Cook pasta according to package directions – Drain.
  • Add to crock pot
  • Stir well and serve

Source:   allthecooks.com; http://www.allthecooks.com/crockpot-buffalo-chicken-pasta.html

Slow Cooker Sweet Ribs

We’re coming out of a pretty great weekend.  Friday was Walt’s and my 10 year wedding anniversary.  We had always said we’d like to spend our 10 year anniversary in Italy but life had other plans for us and that’s OK, maybe we’ll be able to do it for our 15th.  It was a great day without Italy, Walt surprised me and took the day off so we could spend it together and go out for dinner.  Having him home was a nice surprise.

Saturday we went and picked up a few pumpkins and Sunday was dedicated to flag football, even in the rain.  This year Joshua’s on the “Lions” and they won 32 to 14, so far they are 3-0 for the season…Way to go Lions!!  Coming home from the game Sunday to Mississippi Pot Roast in the slow cooker and homemade Hershey Chocolate Pie made the end of our weekend perfect.

Now we’re back to Monday.  Today Nikki has orientation for new job, so proud of how she’s handled all of the changes her life has gone through over the last few months.  I get to take Eric to school today, be prepared Nikki, if he cries we’re outta there!!

On a good note, the count down to my next weekend begins; 4 days, 24-30 hours.  I know, I have it rough.  Today I’m going to leave you with a recipe for slow cooker sweet ribs.  They are not Walt’s smoked,  slow grilled baby back ribs but they are moist and tasty, perfect with a side of homemade cole slaw on fall or winter day.

Slow Cooker Sweet Ribs

SLOW COOKER SWEET RIBS 

What You’ll Need:

4 pounds country-style boneless ribs

2 tsp. Worcestershire sauce

1 tsp. vinegar

1 bottle of Sweet Baby Rays BBQ Sauce

2 tbs. brown sugar

Directions:

  • Spray slow cooker with cooking spray
  • In a bowl, mix together all the ingredients except for the ribs themselves
  • Place ribs in slow cooker
  • Pour sauce over ribs, and turn to coat
  • Cover, and cook on Low 6 to 8 hours, or until ribs are tender

Mongolian Beef – Slow Cooker Style

WoW, not only has Monday arrived on what seems like the heels of last Monday, it’s also the last Monday of September.  September seemed to fly by much quicker than I would have liked it to, the grandbabies just went back to school it can’t possibly be September 30 already….I’m not ready to slide into October!!

Working, even part-time, has attributed to the days just flying by.  When I was home full-time one day just kind of melted into the next but now that I’m out of the house six hours a day and hanging out with little Eric a few days a week before coming home I’m back on a schedule of sorts so as I check off things that need to get done and routine tasks time just flies by.

Fall and winter are not my favorite times of the year.  Now is the time I start my countdown to next spring with holidays; Halloween, Thanksgiving, Christmas and New Year.  Come on…..let’s bring them on, celebrate and move on to the next.  January 1st the excitement increases, now it’s a down hill slide into Spring; slushing through Valentine’s Day,  breezing into Easter Sunday and Memorial Day until summer arrives once again, bringing warm temperatures, lots of color and time outside.

But, it is fall and with the changing of the seasons and temperatures comes heartier meals; soups, stews, sauces.  I pinned this Mongolian Beef recipe from the “Meet Penny” blog at http://www.meetpenny.com/2013/06/recipe-crock-pot-mongolian-beef/  while surfing on Pinterest.  I pinned it a while ago and kept passing it over all summer, waiting for the weather to get a little cooler and for Joshua’s flag football season to begin so that I could throw it into the crock pot and have a (hopefully) delicious meal when Walt and I got home.

I made this dish a few weeks ago and it was fantastic, Walt and I both loved it.  Of course I made a few minor little changes…

  • Instead of using the London Broil or the beef tip roast I just used 2 lbs. of stew beef and the beef was amazingly tender*
  • Instead of dry sherry I used a mixture of apple cider vinegar and water**
  • I purchased already slivered carrot strips – next time I will slice the carrots, my thin carrot slivers got lost in the meat and the sauce, I’d rather have carrot slices that I can pick with a fork***
  • I used ground ginger instead of fresh****

This was the perfect dish to come home to on a Sunday afternoon after a football game.  We walked through the door and the house smelled wonderful, I made rice (not instant) and we were ready to eat.  Give it a try, I bet you’ll love it too.

MONGOLIAN BEEF – SLOW COOKER STYLE

Crockpot Mongolian Beef

 What You’ll  Need:

1.5 – 2 lbs. Stew beef*

1/4 cup corn starch

1 medium onion thinly sliced

3-4 large carrots sliced thinly***

1/4 tsp. ground ginger****

2 cloves minced garlic

3/4 cup soy sauce

1/2 cup water

2 tbsp. apple cider vinegar and 2 tbsp water to equal 1/4 cup (Replaced 1/4 cup dry sherry)**

3/4 cup brown sugar

1/4 tsp. black pepper

Directions:

  • Toss beef strips/pieces in cornstarch and set aside
  • Mix remaining ingredients in your crock pot and place beef over top (Don’t mix in sauce yet)
  • Cover and cook for 6 to 8 hours
  • Gently stir the beef into the sauce mixture and serve over rice

Source:  http://www.meetpenny.com/2013/06/recipe-crock-pot-mongolian-beef/

Tuscan Pasta With Tomato-Basil Cream

As I grow older I become more focused on the quickest way to getting a tasty dinner on the table without going for greasy, cold, take out burgers.  It’s become even more important since I’ve gone back to work part-time and  I’m also picking Eric up from school three days a week.  I’m dealing with rush hour traffic on two freeways trying to get from southwest suburbs of Detroit to northeast suburbs and not walking through the door until 5:30 p.m. or 6:00 p.m.,  I don’t want to spend a lot of time hanging out over the stove.

Now that Walt is taking sandwiches to work instead of leftovers, I have eliminated the need to cook at least one day a week, sometimes two.  Another day or two we use the crock pot so dinner is ready as soon as I walk through the door.  We generally go out to dinner one day a week so that leaves me with 3-4 days that I actually have to plan meals that I prepare when I get home.  It’s not always easy to come up with meals that I can make quickly and still be tasty when reheated for Walt as he walks through the door a few hours later.

This recipe is quick, easy and tasty.  It started with a bag of ravioli, a jar of Alfredo sauce, a splash of wine, a little basil and parmesan.  What made it perfect?  The fresh chopped up tomatoes right out of our garden.  Try it….you’ll love it too!

Tuscan Pasta With Tomato Basil Cream

TUSCAN PASTA WITH TOMATO-BASIL CREAM

What You’ll Need:

1 (20-oz.) package refrigerated four-cheese ravioli*

1 (16-oz.) jar sun-dried tomato Alfredo sauce

2 tablespoons white wine

2 medium-size fresh tomatoes, chopped**

1/2 cup chopped fresh basil

1/3 cup grated Parmesan cheese

Garnish: fresh basil strips

Directions:

  • Prepare pasta according to package directions.
  • Meanwhile, pour Alfredo sauce into a medium saucepan.
  • Pour wine into sauce jar; cover tightly, and shake well.
  • Stir wine mixture into saucepan.
  • Stir in chopped tomatoes and 1/2 cup chopped basil, and cook over medium-low heat 5 minutes or until thoroughly heated.
  • Toss with pasta, and top evenly with 1/3 cup grated Parmesan cheese.
  • Garnish, if desired.

Source:  http://www.myrecipes.com/recipe/tuscan-pasta-with-tomato-basil-cream-10000001646355/

Baked Pork Chops

Walt loves fried pork chops…..wait, I need to elaborate, Walt LOVES my mom’s way of frying pork chops.  So a few weeks ago when he walked into the kitchen on a Sunday afternoon and saw the pork chops frying on the stove top he got all excited, “Oh sweetie, fried pork chops I love fried pork chops.”

“Slow down Sparky” I chimed, I’m just browning them they are going in the oven.  A cloud, first the shade of confusion quickly darkened to disappointment.  I quickly explained they had to be browned before I baked them and he watched me transfer them to a baking dish and slide them in the oven.

An hour later just as I was getting ready to pour the sauce over them once again my dear husband came meandering into the kitchen (notice a pattern here).  “Whatcha doing?”  “I’m adding the sauce” I replied.  Frowning Walt continued “But I like them……”  “Crunchy, I know” I replied, and slid them back into the oven with the sauce.

Just about this time Joshua wandered up from the basement, “Watcha making grandma, it smells really good?”  “Baked pork chops” I replied, “want to try some with us?”  Now you would have to know Josh, unless it’s pizza or chicken strips he’s not having any of it.  “No thanks, but it smells good” Josh said and went on his way.  That little conversation was an indication that these chops were going to be amazing even though he had pizza on the grill.

I am happy to say that the final result was DELICIOUS!!  I hate to admit this in writing for all to see but I baked four (4) pork chops, served them with mashed potatoes……there were NO leftovers and only two of us ate them!!!

These pork chops were full of flavor and so moist!  Cut only with a fork, fall off the bone moist.  Try them they won’t disappoint and surely will become a family favorite.

As usual, I did make a few minor adjustments:

  • The recipe called for 6 pork chops I only made 4 good-sized chops
  • I used two cans of Golden Cream of Mushroom soup – they recommended regular Cream of Mushroom Soup
  • I used Crisco to pan fry not oil
BAKED PORK CHOPS
Baked Pork Chops
What You’ll Need:
4-6 bone-in pork chops about 1-1.5″ thick – DO NOT USE THICK CHOPS
1 tsp. Garlic Powder
1 tsp. Lawry Seasoning Salt
2 eggs beaten
1/4 – 1/2 cup flour
2 cup Italian Seasoned Bread Crumbs
2 cans Golden Mushroom Soup (Original recipe 1 can – Mushroom Soup)
1 soup can of milk (Original 1/2 can to 1 can soup)
2/3 cup white wine
1/4 cup Crisco (more or less depends on pan size)
Directions:
  • Pre-heat oven to 350 degrees
  • Rinse pork chops, pat dry
  • Mix seasonings into flour
  • Dredge pork chops in flour, dip in egg, dredge in bread crumbs
  • Melt Crisco over medium high heat (drop a little bit of bread crumbs moistened with water into the Crisco to tell when it’s hot)
  • Add pork chops to pan and brown each chop for 5 minutes on each side.  Pork chops should be golden brown – place in 13×9 baking dish – cover with foil
  • Bake for 1 hour
  • In the meantime whisk together soup, milk and wine
  • After an hour take pork chops out of the oven and pour soup mixture over the top
  • Replace foil and bake for an additional 30 minutes

Ranch Mashed Potatoes

Happy Monday everyone!  We’re coming out of a really great weekend, the new furnace and air conditioner were installed on Friday, Saturday Joshua and Kaylee hung out for a bit, we made a big batch of pasta, pizza and bread sticks!  Yesterday we went to Joshua’s first flag football game of the fall 2013 season and yes….we won!!  Busy, busy, busy!!

I know there are probably some who are wondering what’s so happy about a Monday, it’s the first day of the work/school week and usually the most dreaded day of week.  Well I look forward to my Mondays, I pick up Eric from school every Monday (Tuesday and Wednesday too) and we get some Eric and grandma time in before Eric heads off to spend some time with his daddy while his momma is working.  So, I no longer dread Monday’s.

Today I want to share with you my recipe for Ranch Mashed potatoes.  I hadn’t thought about using Ranch salad dressing in my mashed potatoes until one day my Wendy’s take out baked potato came back to the office without sour cream.  The office refrigerator didn’t have sour cream but it did have Ranch dressing packets so I used that instead and became addicted!!  To this day when I order a baked potato from Wendy’s I get a packet of ranch dressing instead of sour cream.

The chances that I will have Ranch dressing in my refrigerator far out weigh the chances that I will have milk.  We just don’t drink or use a lot of milk in fact when I buy milk I only buy a pint because I know we are not going to use it or drink it.

That’s exactly what happened one day long ago, I was making mashed potatoes and realized that I didn’t have enough milk but I did have Ranch dressing so I used the Ranch dressing instead and my potatoes became an instant favorite.

I love recipes that come from ingredients that I’m sure to always have in the house.  These potatoes are also great made ahead and reheated in the oven until warm.  Try them and ENJOY!!

RANCH MASHED POTATOES

Ranch Mashed Potatoes

What You’ll Need:

1.5 – 2.0 lbs. Idaho Potatoes – peeled

2-3 slices American Cheese (I use Kraft American Cheese)

2 tbsp. butter

1/4 Cup Ranch Dressing (I use Kraft Original Ranch – You can increase/decrease to preferrence)

Salt/Pepper to taste

Directions:

  • Place peeled potatoes in a sauce pan – cover with water – bring to a boil – let boil 15 to 20 minutes until potatoes are easily pierced with a fork – Drain
  • Add cheese, butter and Ranch dressing to the potatoes – place cover on pot until cheese melts
  • Mash with hand masher, not mixer
  • Serve

An “Egg”cellent Idea!!

We love breakfast.  If time and schedules would allow, I’d make breakfast everyday.  Unfortunately we fall into “hurry up and go” category of morning rituals much like everyone else these days.  Far from the images of Donna Reed and June Cleaver, preparing breakfast for their families in perfectly pressed dresses and pearls.

But who says breakfast has to be served only in the morning?  Every now and then we like to make an omelet with fresh veggies and cheese inside.  Other times we have a craving for a great Quiche or a good breakfast casserole.

Recently, after a long day, I really didn’t feel like cooking anything too complicated.  After checking the refrigerator and finding eggs, some left over – all ready cooked bacon from Sunday’s breakfast, shredded cheese and sour cream I decided to run out to the garden and grab a few tomatoes and peppers.  I had all I needed to whip up a fresh crustless Quiche.

When you’re looking for something that is quick and easy just check out your refrigerator, I bet you’ll have everything you need to whip up a fantastic “breakfast dinner.”   Breakfast for dinner is always an “egg”cellent idea!!!

Crustless Quiche

CRUSTLESS QUICHE

What You’ll Need:

6 large eggs

2 Tbsp. Sour Cream

8-10 slices of bacon cooked and chopped

1/4 cup of green pepper chopped (you can add red, yellow or orange as well)

1 small tomato – seeded and chopped

1/2 – 1 cup shredded cheddar cheese (depends on how cheesy you like your Quiche)

Directions:

  • Pre-heat oven to 350 degrees
  • Spray an 8×8″ baking dish with Pam
  • Crack eggs into a bowl, add sour cream and whisk
  • Pour into baking dish
  • Spread green pepper and tomatoes over the egg mixture
  • Spread the bacon over the peppers and tomatoes
  • Spread cheese over the top of the bacon
  • Bake for 30 minutes or until knife inserted into center comes out clean